The remote PC “listens” while in sleep or hibernation mode for the data packet. If the packet is detected, your PC wakes up. This allows easier access to other Windows machines across a network, meaning you don’t need to physically touch the other PC to wake it up and begin using it. If you want to enable Wake on LAN on Windows 11, here’s what you’ll need to do.
How to Enable Wake on LAN in BIOS
To use Wake on LAN on Windows 11, you’ll need to make sure your network is configured to allow it. For example, you’ll need to make sure that all of your PCs are connected to your network using a wired Ethernet connection, as this feature isn’t supported on Wi-Fi networks. If you have a PC without an Ethernet port, you can’t use Wake on LAN out of the box. You’ll need to get a USB 3.0 to RJ45 Gigabit Ethernet LAN adapter (you can also get a USB-C Ethernet adapter). A P2P network between PCs is required, and the PC being “woken up” needs to be in sleep mode or hibernation mode.
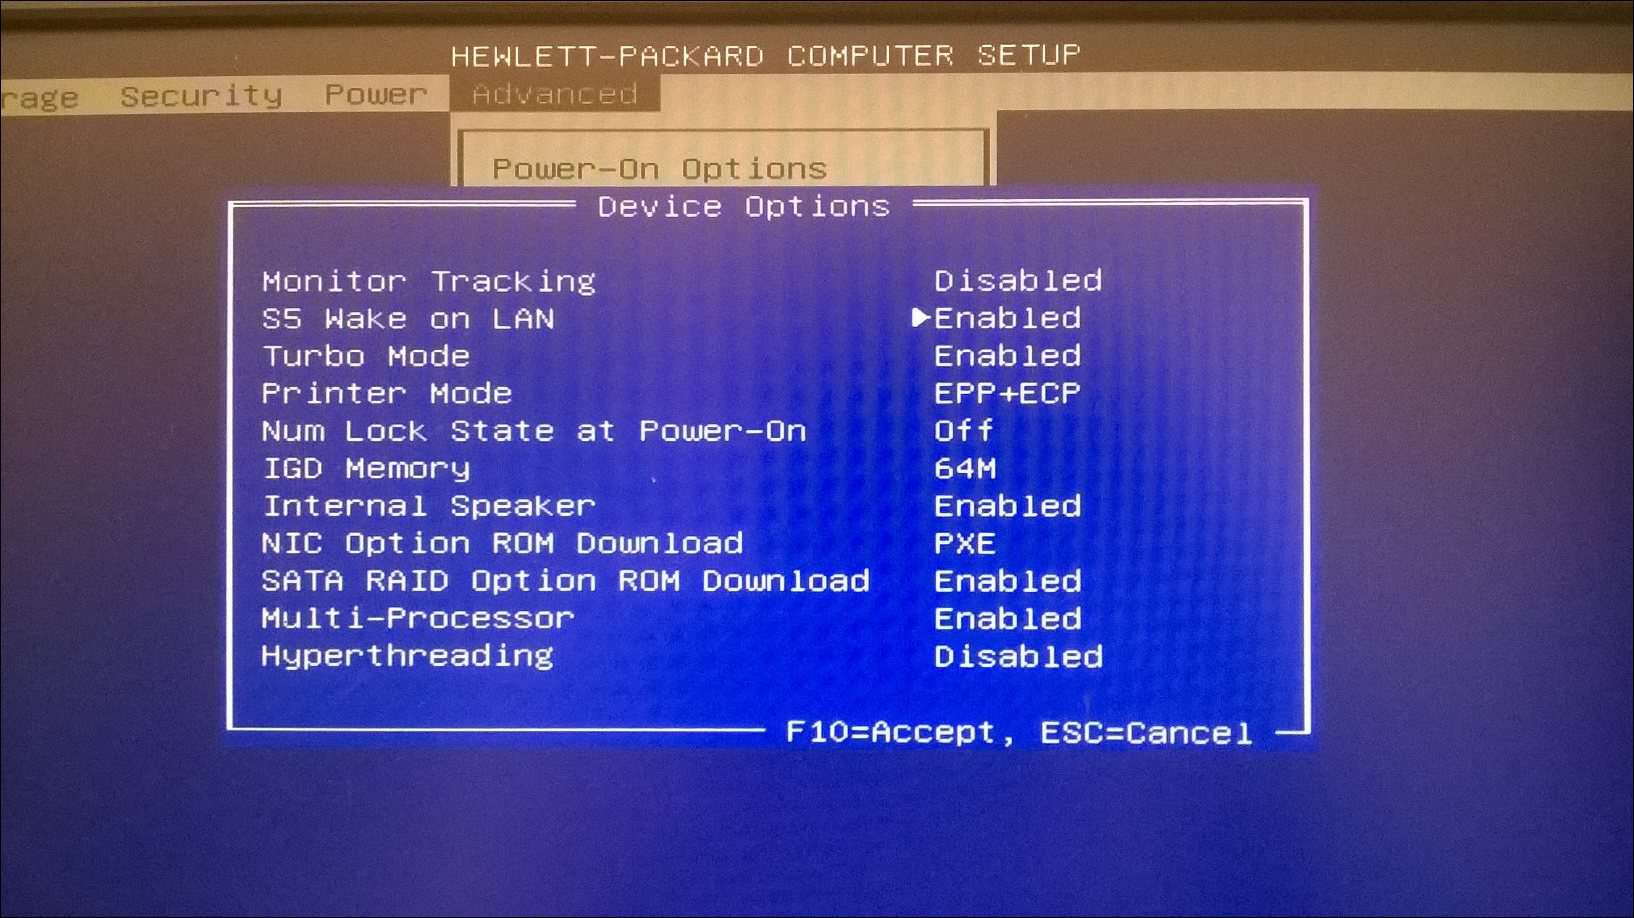
Enabling Wake on LAN in BIOS/UEFI
Before going to Windows 11, you need to make sure Wake on LAN is enabled in the PC’s BIOS or UEFI settings. Usually, you can get to the BIOS/UEFI menu by hitting Del or by pressing a function key like F2 or F12 during the boot-up process. Next, check for settings under “Power Options” or the “Advanced” section in the BIOS/UEFI menu and enable the Wake on LAN option. These steps will vary, depending on your PC, so if you’re unsure, consult your PC manufacturer’s support documentation.
Enabling Wake on LAN on Windows 11
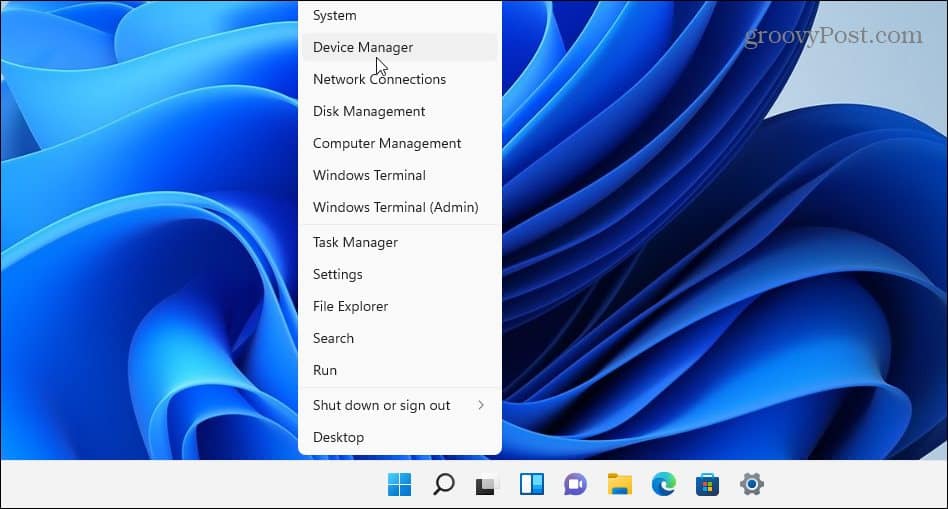
If your BIOS/UEFI settings are configured, you can then configure Windows 11 to support Wake on LAN functionality. To do this, right-click the Start button and select Device Manager from the menu that appears.
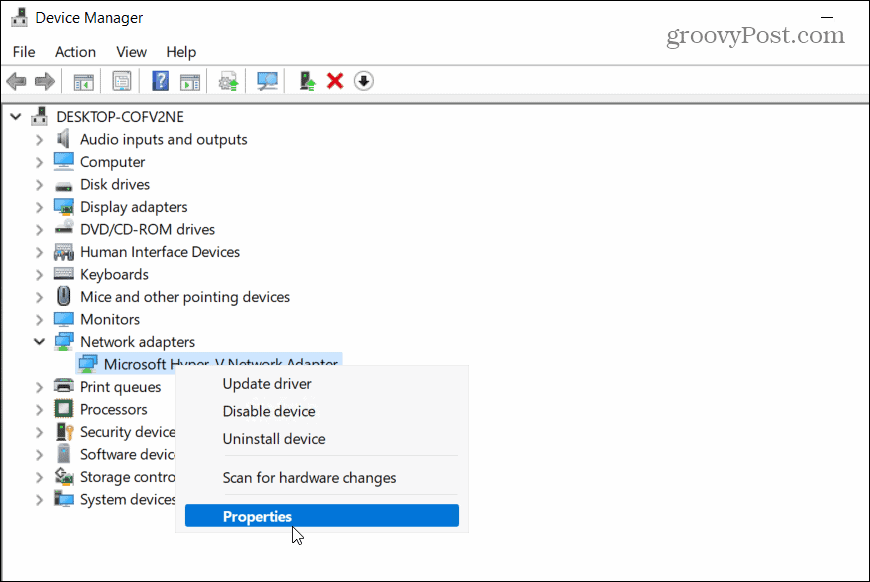
Next, scroll down and expand Network Adapters in the Device Manager window. Right-click on the Ethernet adapter and select Properties.
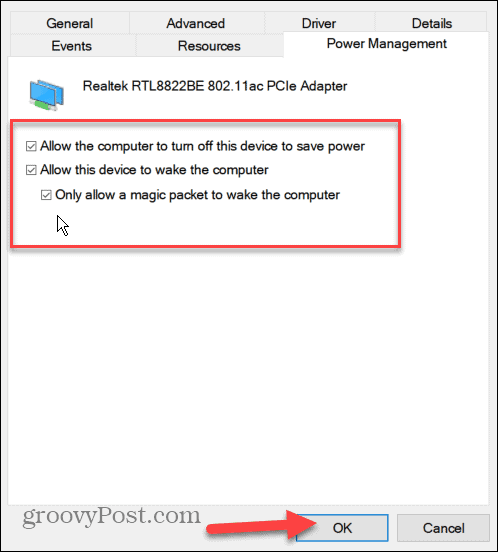
Click the Power Management tab and make sure to check all of the available options, including Only allow a magic packet to wake the computer. Press OK to save your settings.
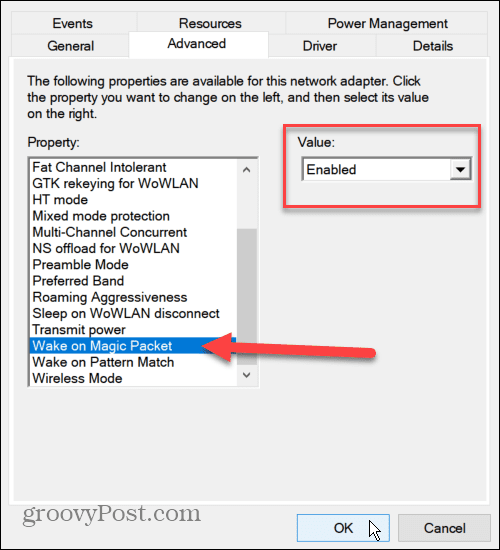
Now, select the Advanced tab in the Ethernet adapter properties window. Scroll down and highlight the Wake on Magic Packet in the Property option, set the “Value” box to Enabled, and click OK.
Wake on LAN is now enabled on your PC and you begin using it, but if it doesn’t work, restart your PC first. You’ll need to double-check that your PC is in sleep or hibernation mode for this to work and make sure to connect your PC via Ethernet only.
How to Use Wake on LAN on Windows 11
Enabling WoL on Windows 11 is just the start. You’ll next need a special Wake on LAN tool to send the magic packet to wake up your PC. Several free, open-source Wake on LAN tools are available, including the imaginatively named WakeOnLAN (produced by Aquila Technology. You could also try WakeMeOnLAN (created by NirSoft). For this article, we’re using WakeOnLAN, but you’re free to use another WoL tool.
Find the Remote PCs MAC Address
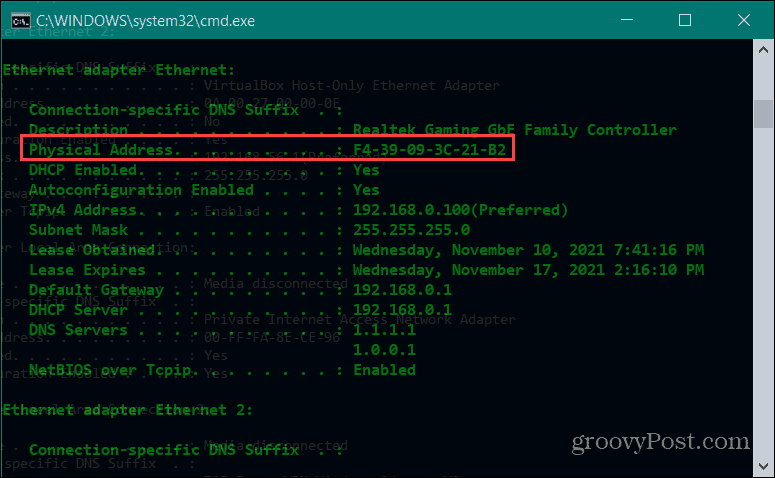
After you download and install the software, you’ll need to know the MAC address of the remote PC you want to wake up. You can find it by using the command line or PowerShell. Launch either utility via the Start menu and type ipconfig /all. Scroll down through the list of data to find the Ethernet adapter. The MAC Address is the “Physical Address” entry you’ll see listed in the results.
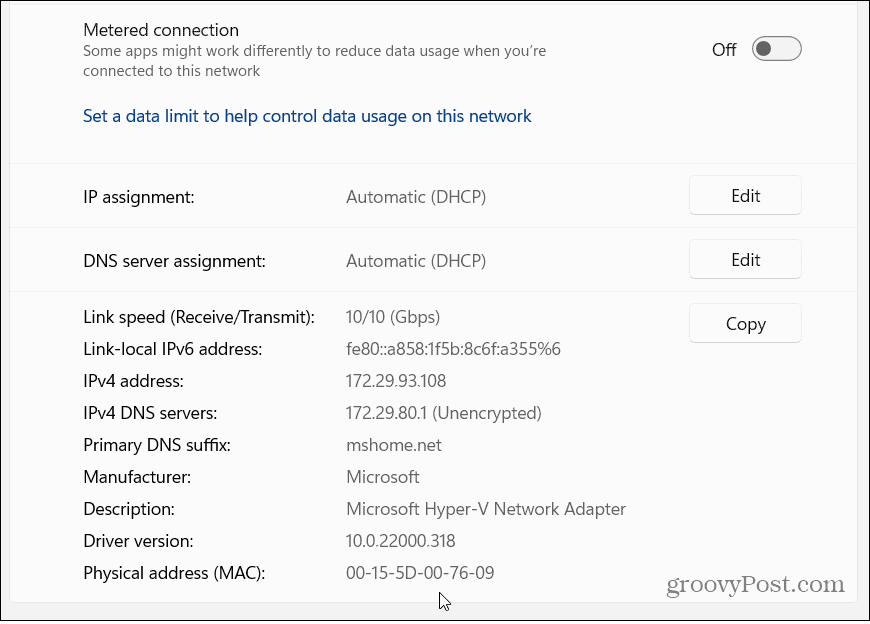
You can also find the MAC Address via Settings. Open Settings via the Start menu, then select Network & Internet > Ethernet. Scroll down to see the Physical Address (MAC) listed in the connection information.
Sending WoL Packets with WakeOnLAN
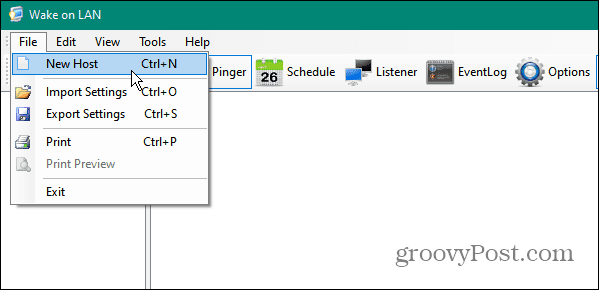
Now that you have the MAC address, you can start with the WakeOnLan app. Launch the app via Start, then press File > New Host.
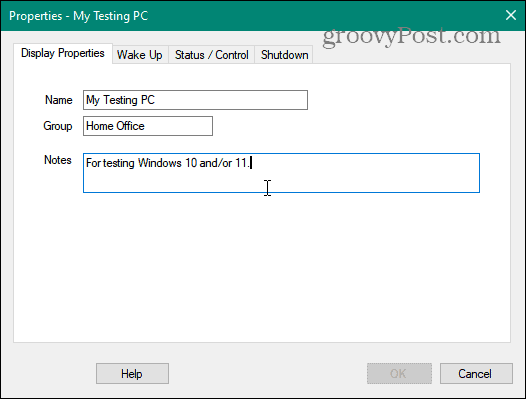
Next, type in a name for the machine. You can also provide a group name (to separate PCs into specific groups) and a descriptive note.
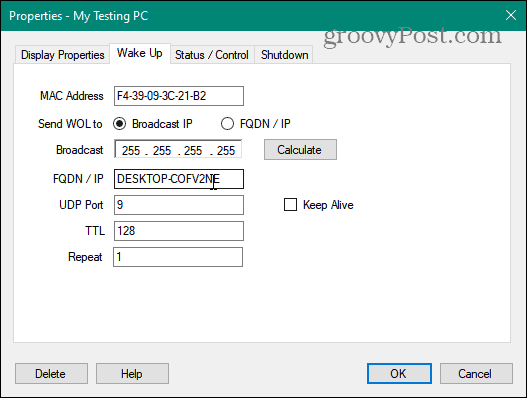
Click the Wake Up tab and type in the MAC address of the remote PC, then select the Broadcast IP button. Leave the Broadcast field as the default entry. For the FQDN/IP field, type in the PC’s hostname.
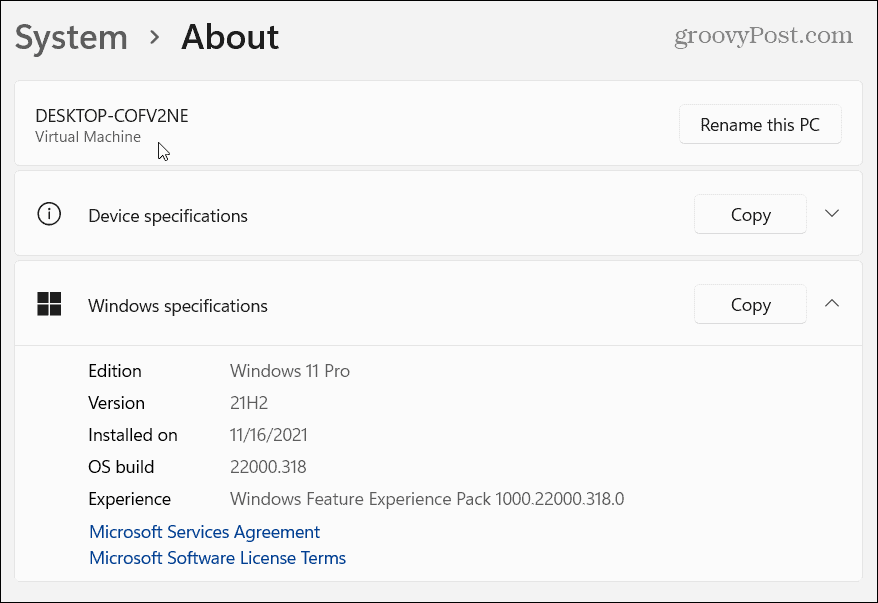
If you need to find the name of the remote PC, press Start > Settings > About. If it has an unusual hostname, you might want to rename the machine first.
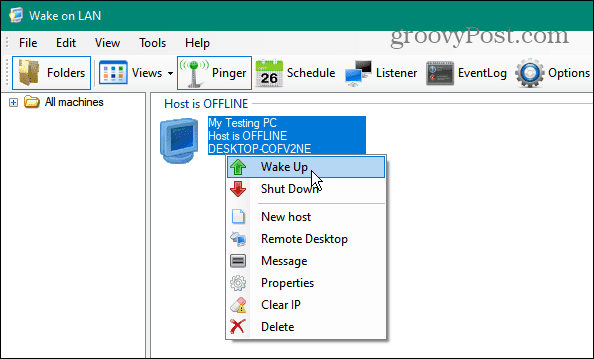
Next, right-click the remote machine you want to wake and select “Wake Up” from the menu. Once a PC is running, you can use Remote Desktop (RDP) to connect to it.
Monitoring Window 11 PCs
If you enable Wake on LAN on Windows 11, you’re free to access and control your PCs remotely. The steps above should help you get started, and if you’re using WoL on Windows 10, the steps shouldn’t seem too dissimilar. This is also a great way to keep your PCs powered down, saving you money on your energy bills in the process. For more on Windows 11 networking, take a look at how to set up a metered connection. For better security and a faster web browsing experience on your Windows 11 PC, you may want to change your DNS settings next. Comment Name * Email *
Δ Save my name and email and send me emails as new comments are made to this post.


![]()
